Setting up a python development environment
Installing software
Two pieces of software need to be installed:
- Python
- VS Code (editor)
ArupCompute is compatible with Python 3.8. Please develop your library using Python 3.8.
Python
Download python from the official python website
For the easiest install experience on a typical Arup Windows x64 based laptop look for a download link title Windows Installer (64-bit)
If you are developing new libraries for hosting on ArupCompute you will currently want to install v3.8.10
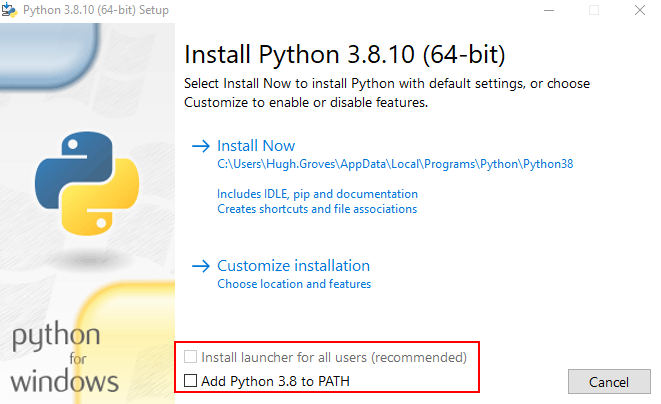
When installing python make sure both of the boxes on the install screen are not ticked.
VS Code (Visual studio code)
To install VS Code download it from the VS Code website. Ensure that you select the 'User Installer' as this will install without admin privileges.
Configuring software
After both have been installed:
- Open VS Code
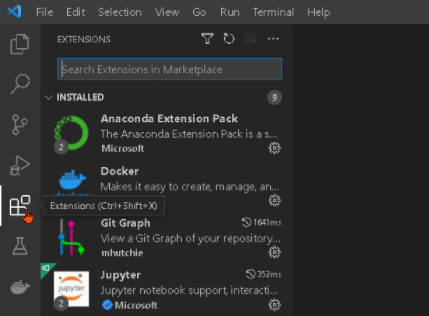
- Open up the extensions pane of the left hand side of the screen
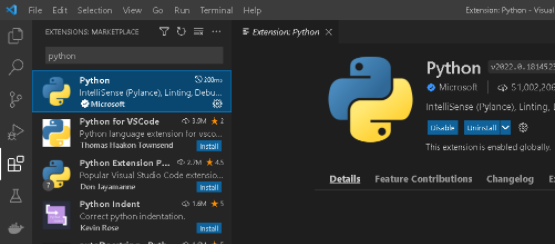
- Search for the python extension and install it
Testing software is configured correctly
- Open up VS Code
- Create a new file
File > New File
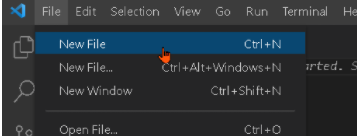
- Click on
Select a languagenear the top of the file, and in the box that appears typePython

To select the correct version of python use ctrl + shift + P to open up the command palette and type Python: Select Interpreter, then select one from the options

If the above steps don't work then something on your machine is misconfigured. Reach out on the Arup Python Yammer for support.
Creating a clean environment
Working on many different coding projects can lead us to having many different libraries installed. Some of these libraries may interfere with one another, or we just want to use different versions.
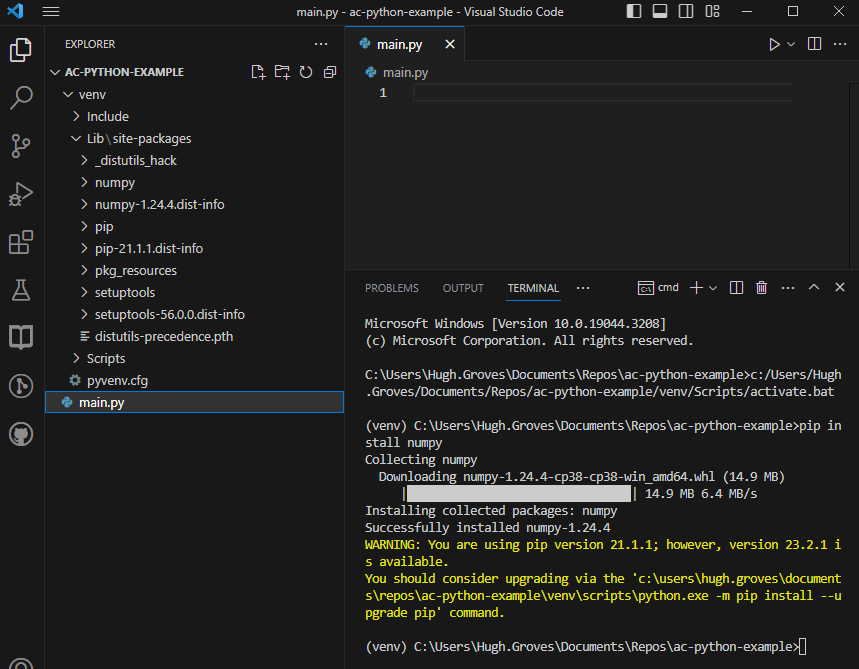
To allow us to work cleanly we use 'virtual environments' to separate the dependencies of different projects. To do this we use the venv module of python.
It is best practice among Python developers to use a project-specific virtual environment. We strongly recommend you create a new environment for each ArupCompute python library you work on.
- Create a new folder to store all of your project files in
- Open the folder in VS Code
- Bring up the VS Code command palette using
ctrl + shift + P, typePython: Create Environment, then select theVenvenvironment type and Python installation (the version) you want to use as the base for your virtual environment


The python version you want to use must already be installed on your machine
- You will notice that a
.venvfolder has been created within your folder - this stores everything about your virtual environment. Note that this command will also add a .gitignore file to the virtual environment to help prevent you from accidentally committing the virtual environment folder to source control
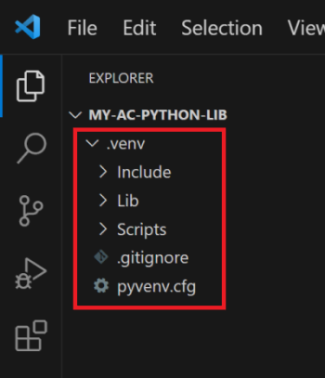
If using source control (git) to manage your repository, adding a .gitgnore file will allow you to exclude certain files and directories from being tracked in your Git history. Make sure to add a .gitgnore file to prevent the (often bulky) venv folder from being included in your source control.
A good example .gitignore can be found on GitHub.
Other people you work with will need to setup their own .venv folders locally, and can recreate the dependencies utilising your requirements.txt
If you want to create a virtual environment manually, use the following steps (where ".venv" is the name of the environment folder):
- Open up a new terminal in your working folder
- Execute the command
py -<version> -m venv .venvfor example if we want to use python v3.8py -3.8 -m venv .venv
- When you go to open up your working folder in VS Code again, select the interpreter you've used in creating the
.venv. VS Code will then associate this folder with this python version from now on.
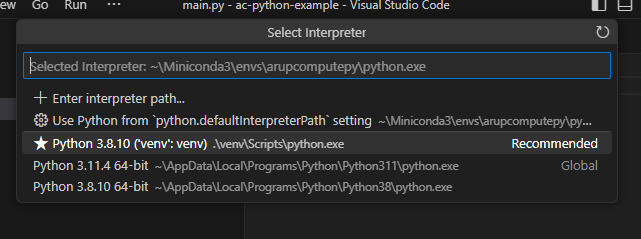
- To install any libraries you need open up the integrated terminal (
ctrl + '). You will note that the command line is preceded with(.venv)to assure you that you are using the correct virtual environment. You can now use familiar tools likepipto install your required libraries.
