Getting Started - Visual Studio Professional guidance
Full Visual Studio licences are expensive. Unless you already have one, or are moving into writing code full time, it is instead recommend to use Visual Studio Code.
Creating the library
You can decide to write you library in either .NET Core 6.0 or .NET Core 8.0. We recommend .NET 8.0.
Note: This document refers to .NET 8 and uses Visual Studio 2022.
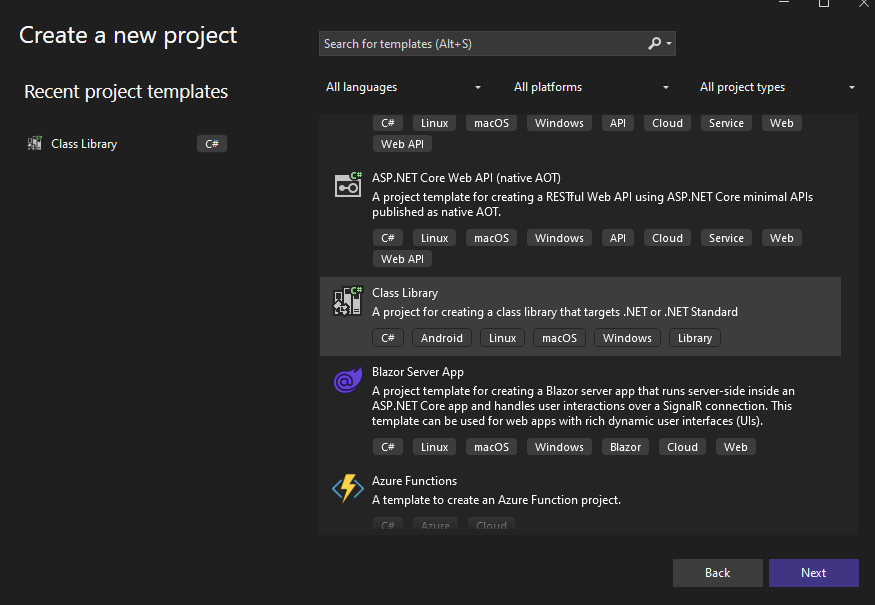
In Visual Studio (or you IDE of choice), select to create a Class Library project.
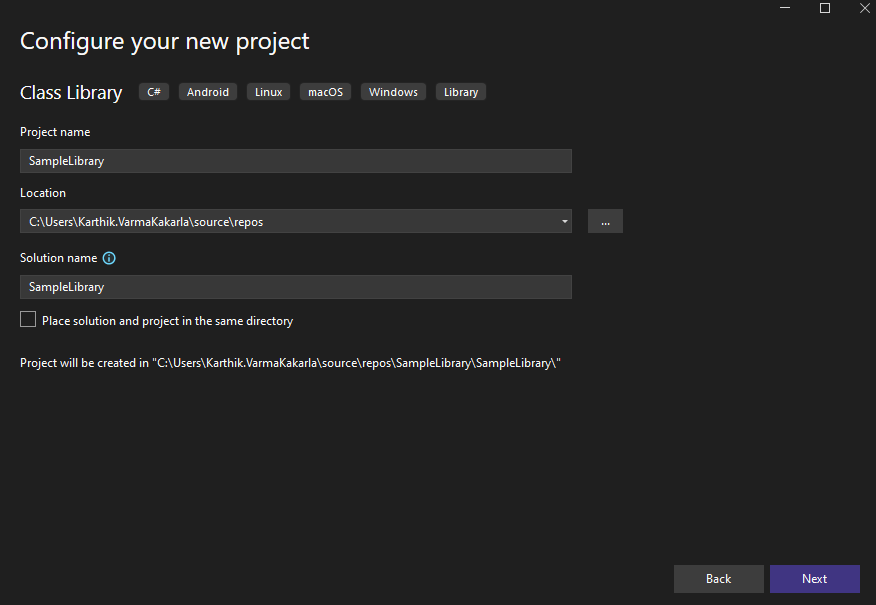
Next give it a name that uniquely describes you library:
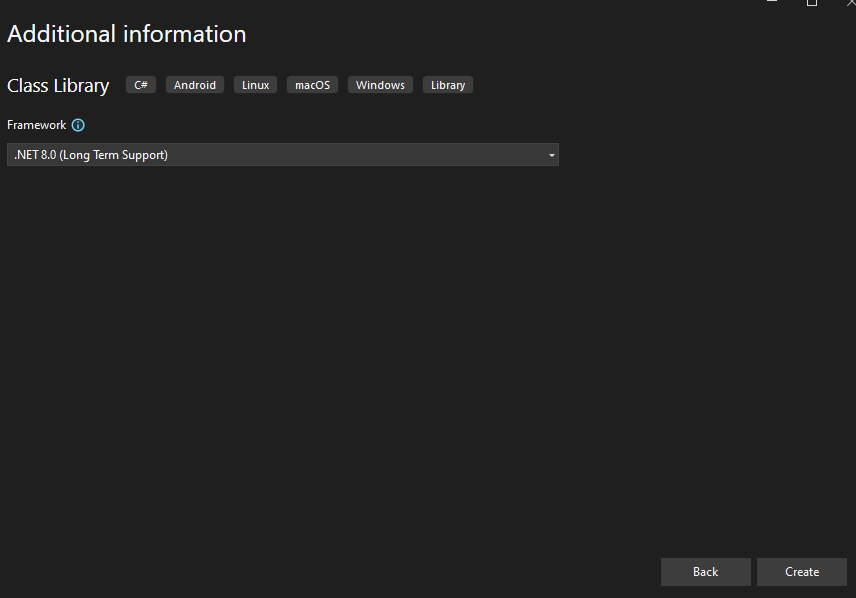
Next, select .Net 8.0(Long Term Support) as the Framework:
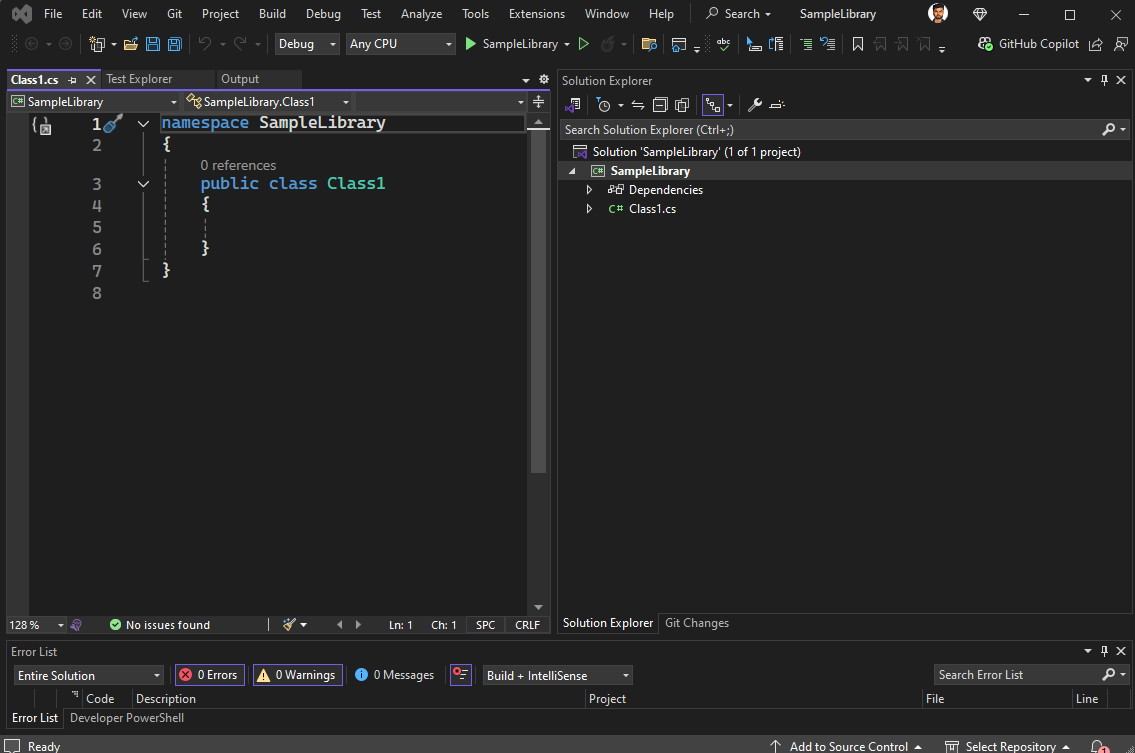
Upon clicking Create, a new solution opens with a default class:
Rename the classes that you're going to need and organize them by folders as it most makes sense:
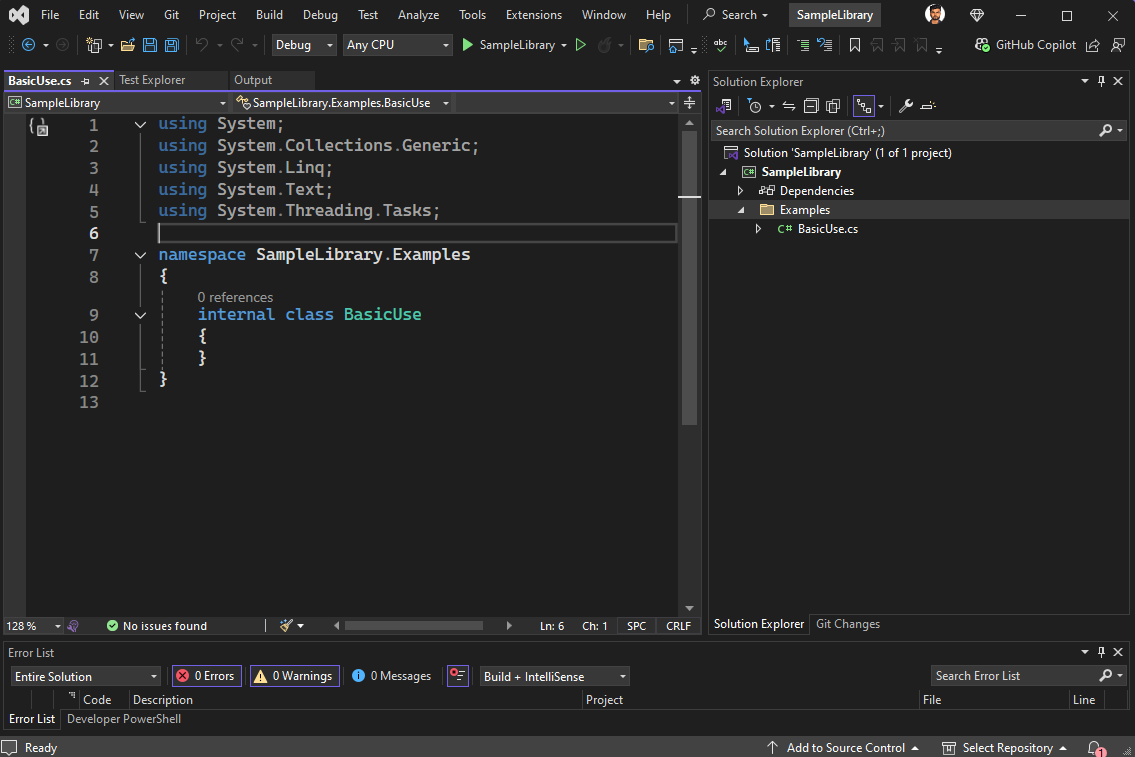
The namespaces of each class will be used to generate the menu structure in ArupCompute. We recommend keeping your namespaces aligned with the file/folder structure of your classes.

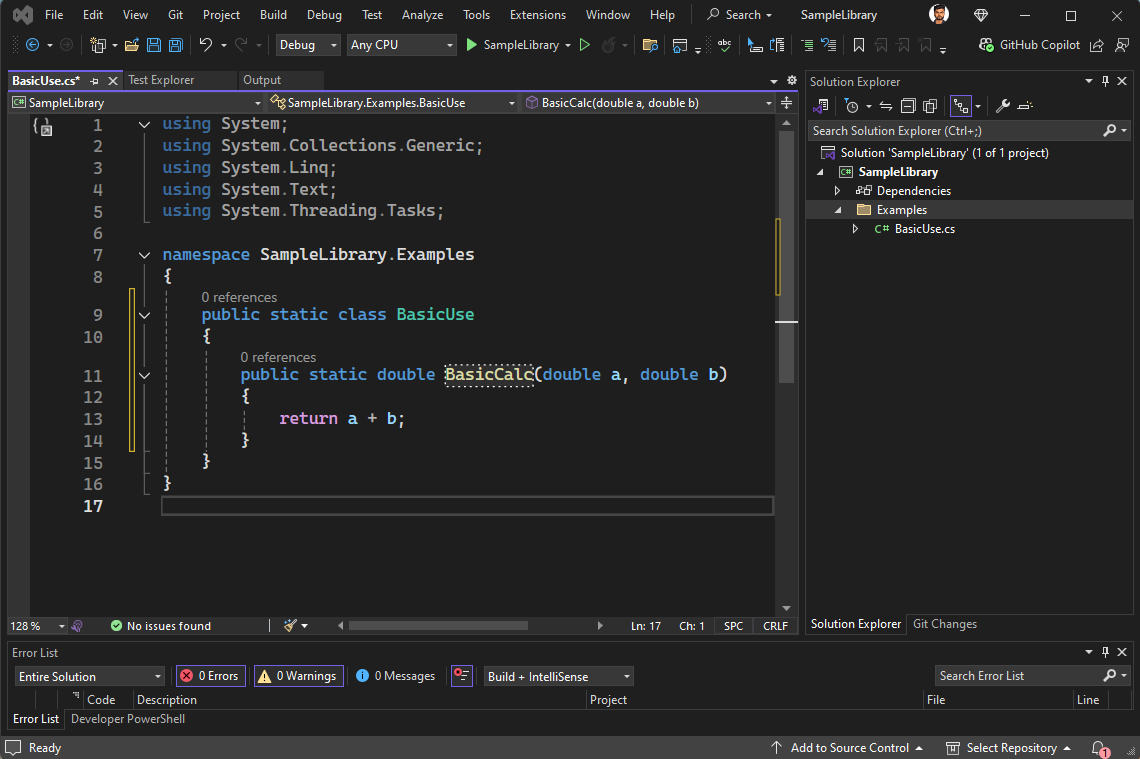
Now, we can finally add our first function/calculation/method:
    public static double BasicCalc(double a, double b)
    {
        return a + b;
    }
This is as simple as a calculation can get! But by itself it's not enough to work, we'll need to add specific ArupCompute attributes. We'll see that in the next section.
Note that the both the class and function are now marked as public and static, unless you know what you are doing this is how you should set up your classes and function in order to work well with AC.
Linking the ArupCompute .NET SDK
The ArupCompute .NET SDK is a library we've written to facilitate the process of writing new calculations. You'll have to install through through Nuget Package Manager and reference it in your project as it includes mandatory attributes you'll need to decorate your methods/classes with.
You can see all the examples below in the sample repo https://github.com/arup-group/arupcompute-sample-library.
Adding the ArupCompute NuGet Feed to Visual Studio Professional
The ArupCompute .NET SDK comes as a NuGet package that can be installed with one click, but first you need to add the ArupCompute NuGet feed to your Visual Studio installation.
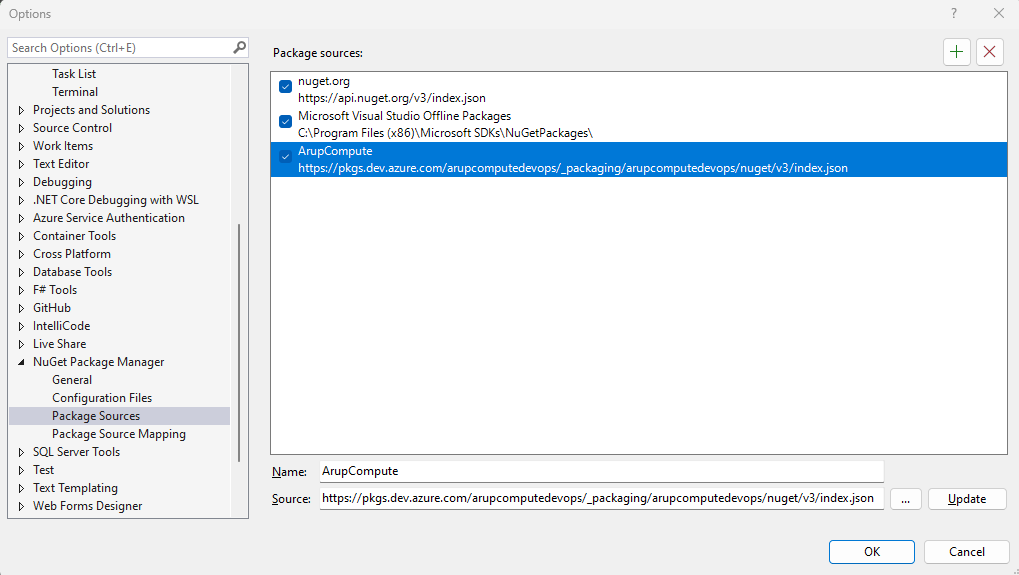
- Click on Tools > Options > NuGet Package Manger > Package Sources
- Then add a new package source with the following properties
- Name:
ArupCompute - Source:
https://pkgs.dev.azure.com/arupcomputedevops/_packaging/arupcomputedevops@Release/nuget/v3/index.json
- Name:
For how to add the feed in VS Code follow the DesignCheck guide
Adding the NuGet package to your project
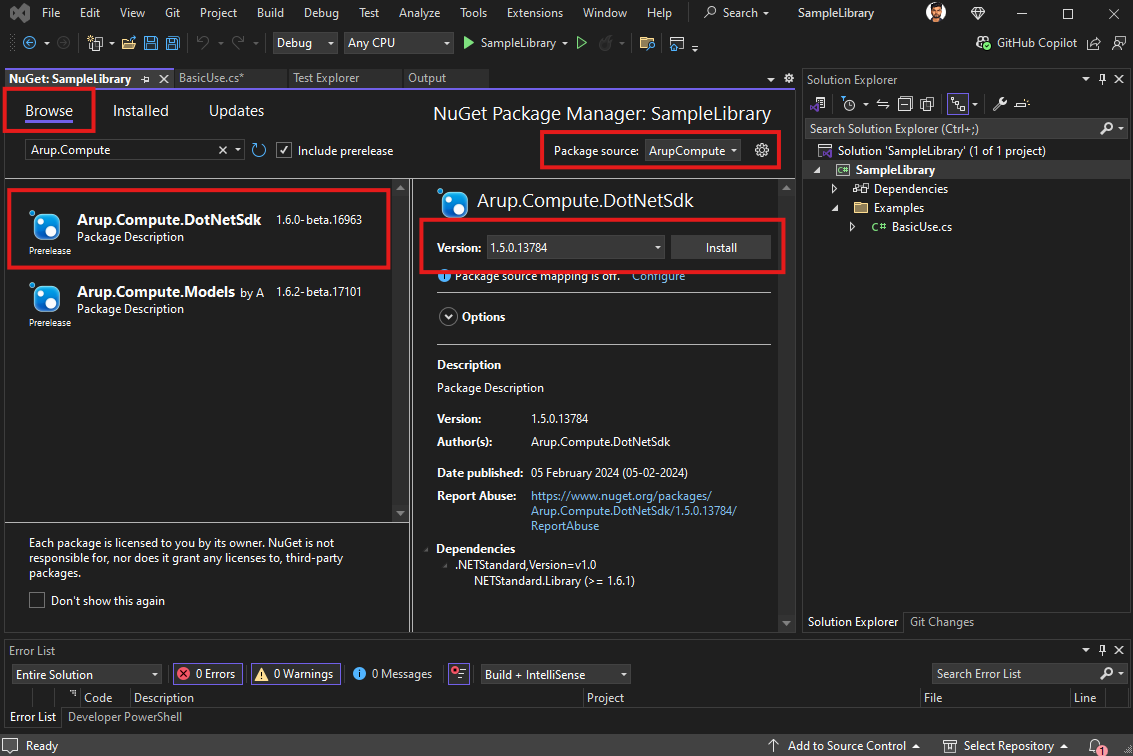
You can now add the NuGet package to your project:
- Right click on the project name, then > Manage NuGet Packages...
- On the top right select the
ArupComputepackage source - Make sure you are on the "Browse" tab
- Select
Arup.Compute.DotNetSdkand click install
Building the Library
We can build the library using the command dotnet build. The created binaries will end up the in the directory <myprojectname>\bin\<releaseConfiguration>\<targetedVersion>, which will likely look like SampleLibrary\bin\Debug\net8.0
All dotnet commands should be executed from the same folder as the relevant .csproj file
This is as simple as a calculation can get! But by itself it's not enough to work, we'll need to add specific ArupCompute attributes. We'll see that in the Using the .NET SDK section.